|
Report Header and Trailer |
|
A report can also optionally have report header and report trailer sections. A report header is printed once at the beginning of the report and can be used to output such things as a title page and opening message, etc. The report trailer is printed once at the end of the report and can be used to output a closing message, blank page, etc. In the case where a report definition generates multiple separate reports, each individual report will have its own report header and trailer.
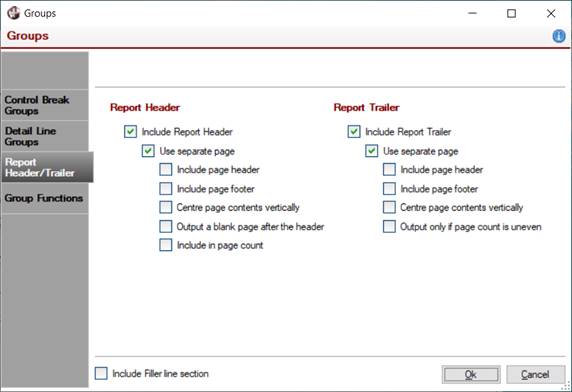
To add a header or trailer to a report, select Groups from the Report Designer Edit menu, or click on the cell displaying a small arrow next to a section line in the leftmost column of the report layout. Then, select the Report Header/Trailer tab. To include a report header or report trailer, select the appropriate check box.
If the Include Report Header or Include Report Trailer option is selected, an option to print the header or trailer on a separate page is displayed. If this option is selected, then additional options are available, allowing you to specify whether to include a page header and footer or to centre the page contents vertically.
In the case of the report header, additional options are provided to output a blank page after the header (for duplex printing) and to include the header page in the page count. The report trailer also has an option to be output only if the page count is uneven (for duplex printing). If a trailer is not printed on a separate page and a filler section is defined, an option is provided to use a Filler Line to fill the gap between the last line and page bottom.
When a header or trailer is added to a report, the new section will be added to the Report Designer layout below the page footer section.
If the output destination does not support pagination (such as the Clipboard and HTML output), then the header and/or trailer will be output as if the Use separate page option had not been selected.