1.
From the IDE Main Launcher, expand the Security category and select User Definitions.
2.
The Sign On window opens. Log in as a user assigned to the ADMIN classification.
3.
The User Maintenance window opens. From the Userid drop box, select the user for whom email verification will be enabled.
4.
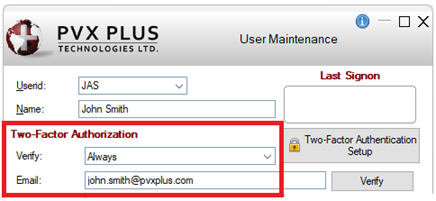
In the Two-Factor Authorization section, use the Verify drop box to select how often Two-Factor Authentication is required for this user:
Never: Not required for this user.
On new/expired device: Required only when signing in from a new or expired device.
Always: Required every time the user signs in.
5.
In the Email field, enter the user's email address. The window looks similar to the one below:
6.
Click the Verify button beside the Email field.
7.
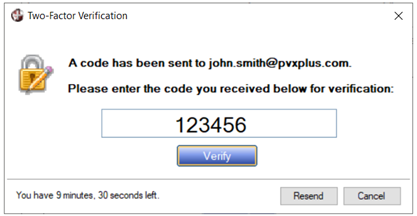
A verification email containing a six-digit code is sent to the user's specified email address.
8.
In the Two-Factor Verification window, enter the code and click Verify to confirm the email address.
9.
Once email verification is successful, the Verify button (beside the Email field) is replaced with the text "Verified".
10.
Click the Save button to save the user settings.