|
How to Create a Top Menu Bar with Sub-Menus |
This tutorial shows you how to create a top menu bar with sub-menus in Webster+.
The following example shows a top menu bar with two sub-menus, Ledger and GL Accounts.
For this tutorial, the Ledger sub-menu will be defined. It has three options - Post to Ledger, View Ledger Postings, and View Transactions by Date. This menu will be added to the Products page.
These steps show you how to define the menu bar items using Menu Maintenance.
|
1. |
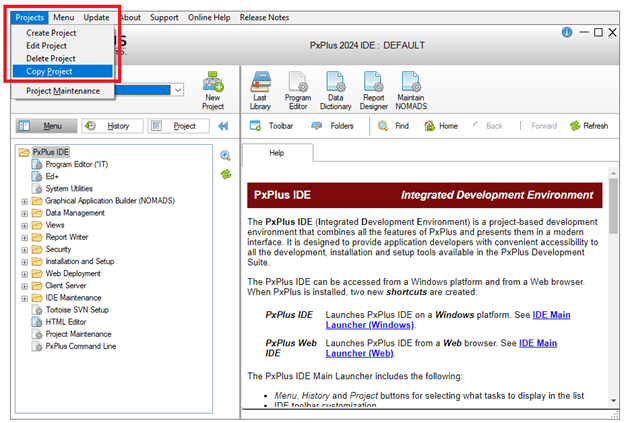
On the left side, click Setup. Then, in the top menu, click Menus to access the Menu Maintenance page. | ||||||||||||||
|
2. |
In the Menu field, enter Ledger as the menu name. | ||||||||||||||
|
3. |
Define the menu options by entering the details in the grid. For a description of each column, see Menu Maintenance. In the first row, enter the following details:
The Action entry (Submenu) identifies Ledger as a sub-menu item, and the Associated Name entry (gl_actions) specifies the name of the related sub-menu. For this example, the gl_actions sub-menu will be defined later. See Defining the Sub-Menu Options. | ||||||||||||||
|
4. |
After completing the entries, the window looks like this: | ||||||||||||||
|
5. |
Click Save at the bottom. | ||||||||||||||
|
6. |
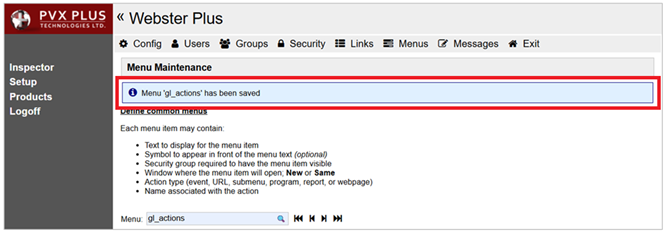
A message appears near the top confirming that the "Ledger" menu has been saved. |
Define the options for the gl_actions sub-menu (see Step 3).
|
7. |
In Menu Maintenance, enter gl_actions in the Menu field.
| ||||||||||||||||||||||||||||||||||||||||||
|
8. |
The gl_actions sub-menu has three options. Enter the following details (one option per row):
| ||||||||||||||||||||||||||||||||||||||||||
|
9. |
After completing the entries, the window looks like this: | ||||||||||||||||||||||||||||||||||||||||||
|
10. |
An optional separator line can be added between sub-menu options by entering three or more dashes in a blank row and then dragging the row to the desired location. For this example, a separator line will be added below the Post to Ledger option. In the blank row, enter the following details for the Text and Window columns:
| ||||||||||||||||||||||||||||||||||||||||||
|
11. |
After completing these entries, the window looks like this: | ||||||||||||||||||||||||||||||||||||||||||
|
12. |
In the first column of this row, click the Drag (triple bar) icon, and while holding down the mouse, drag the selected row up so it sits directly below the Post to Ledger row. Release the mouse. | ||||||||||||||||||||||||||||||||||||||||||
|
13. |
After moving the row, the window looks like this: | ||||||||||||||||||||||||||||||||||||||||||
|
14. |
Click Save. | ||||||||||||||||||||||||||||||||||||||||||
|
15. |
A message appears near the top confirming that the "gl_actions" menu has been saved. |
Adding the Short Code to the HTML Page
Add the [menubar menu=xxx] short code to the HTML page:
|
16. |
Add the following line of code to the Product HTML page anywhere below the <body> tag (before the page title in this example): [menubar menu=ledger class=font_125]
|
|
17. |
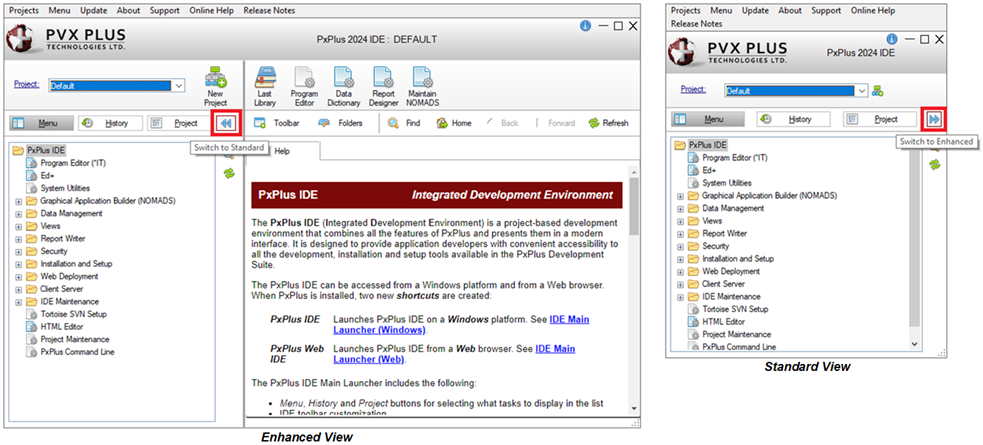
Preview the results. On the left side, click Products and then select Ledger. |
|
18. |
The Ledger menu shows the three options:
|