|
How to Set Up PxPlus Visual Studio Code Extension |
Starting with PxPlus 2024, you can maintain PxPlus programs and text-based PxPlus programs using Visual Studio Code. Visual Studio Code is an industry-leading, free code editor, which has grown in popularity with developers. It is available on Windows, Linux and macOS platforms.
PxPlus programs and text-based PxPlus programs that are opened via this PxPlus Extension are recognized as PxPlus programs by Visual Studio Code. This enables all the Visual Studio Code features and allows PxPlus programs to be edited with syntax checking.
In this tutorial, you will learn how to:
These steps show you how to install and then set up the PxPlus Extension in Visual Studio Code:
|
1. |
Download and install Visual Studio Code from the Visual Studio Code website https://code.visualstudio.com/ for your platform (i.e. Windows). If you are new to Visual Studio Code, this website is a great resource to learn more about it. |
|
2. |
On the Activity Bar on the left side of Visual Studio Code, click the Extension icon. This displays the Extensions view and the Extensions Marketplace. |
|
3. |
Find the PxPlus extension by entering PxPlus in the Search Extensions in Marketplace input box. |
|
4. |
In the displayed list, click on PxPlus and then click the Install button to install the PxPlus extension. |
|
5. |
Once the PxPlus extension is installed, open the Visual Studio Code settings. To do this, click the Gear icon and select Settings from the displayed menu. |
|
6. |
Expand the Extensions node. |
|
7. |
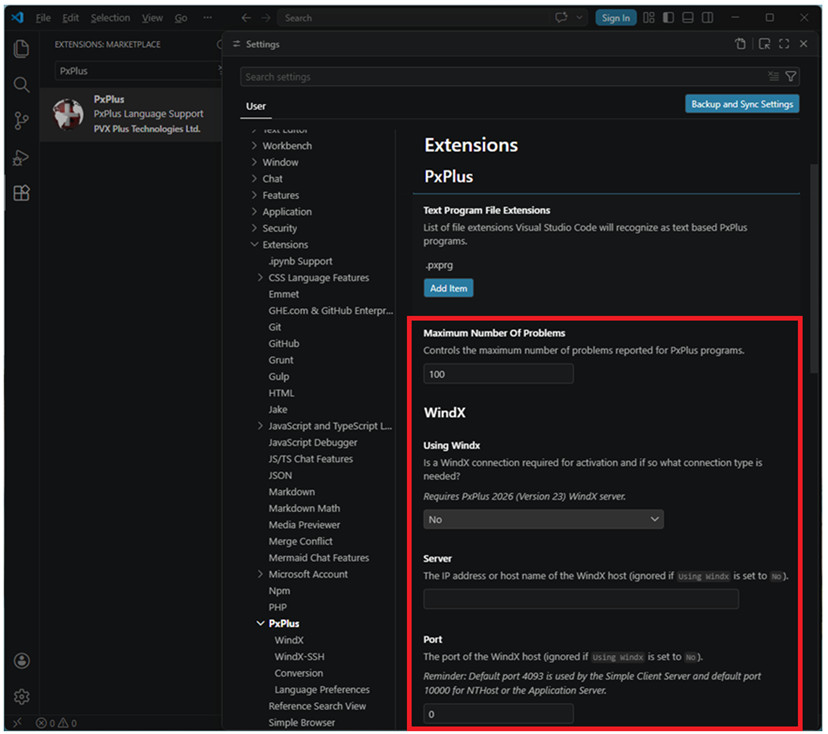
Scroll down the list and select PxPlus. |
|
8. |
Under the PxPlus Path sub-heading, enter the path to the directory where the PxPlus executable is located (i.e. C:\PVX Plus Technologies\PxPlus 2024 or C:\PVX Plus Technologies\WindX Plugin 2026). |
|
9. |
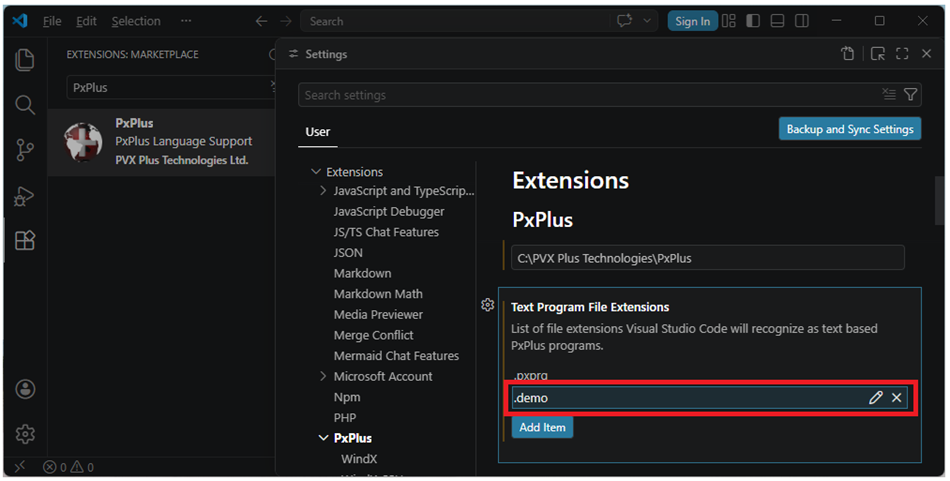
If you plan to work with text-based PxPlus programs, you must specify which file extensions Visual Studio Code should consider as text-based PxPlus programs by adding them one at a time. Under the Text Program File Extensions sub-heading, click the Add Item button. Enter a .xxx file extension in the input box and then click OK to add it to the list. By default, the only extension in the list is .pxprg. To add more file extensions, repeat this step as many times as needed. To edit a file extension after it is added, select it from the list and click the Pencil icon. Edit the extension in the input box and click OK. To discard your changes, click Cancel. To delete a file extension, select it from the list and click the X icon. The extension is removed from the list. |
|
10. |
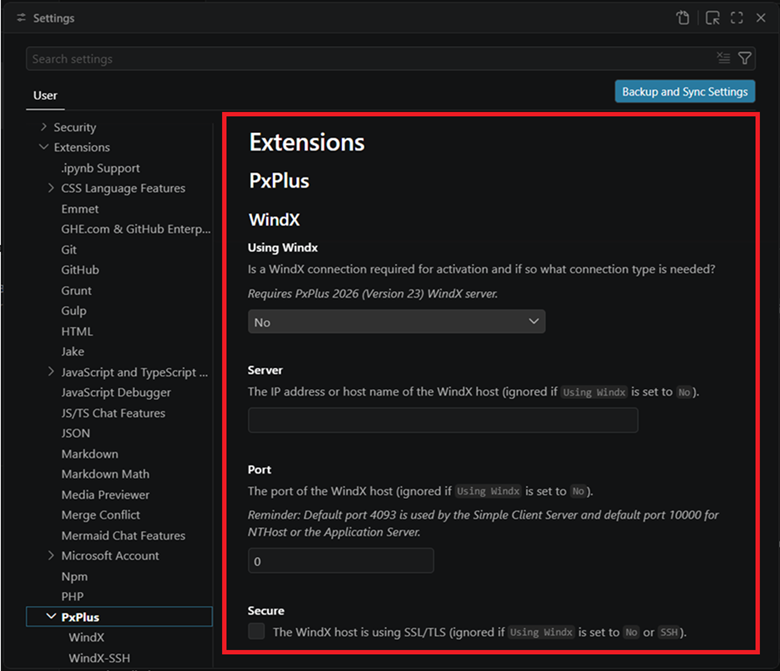
If pointing to a WindX Plug-in, you must also set up the WindX connection. (Support for WindX connections was added in PxPlus 2026.) Under the WindX sub-heading, specify what type of WindX connection to use. Then provide the following: the WindX server IP address or host name, the port, and whether the host is using SSL/TLS. |
|
11. |
If using WindX SSH, you must also set up the SSH connection information. Under the WindX-SSH sub-heading, enter the Username and then click Set password to securely save the SSH password. You must also specify the path to PxPlus on the WindX SSH host. |
|
12. |
If you plan to Compile or List PxPlus Programs, then you should also specify the output directories and file extensions. Under the Conversion sub-heading, enter the Compiled Output Directory and/or the Listed Output Directory. You can also optionally specify a file extension to be added to the output file for both compile and list. |
|
13. |
Review the other PxPlus Extension Settings and select those that apply to your needs. |
With the PxPlus extension now set up, you are ready to edit or create a PxPlus program. Refer to the steps below.
To start editing PxPlus programs, you first need to add a PxPlus folder to the workspace. See Open and Edit Existing PxPlus Programs.
These steps show you how to edit a PxPlus program:
|
1. |
Select the directory where the program to edit is located. For this example, click the Explorer icon on the Activity Bar on the left side of Visual Studio Code. This displays the Explorer view. Click the Open PxPlus Folder button. |
|
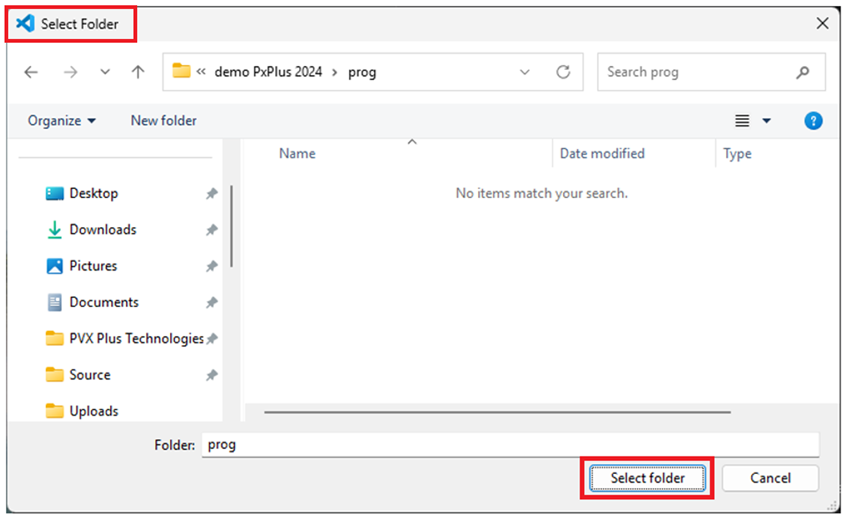
2. |
The Select Folder window is displayed. Select the directory where the program to edit is located and click Select folder. |
|
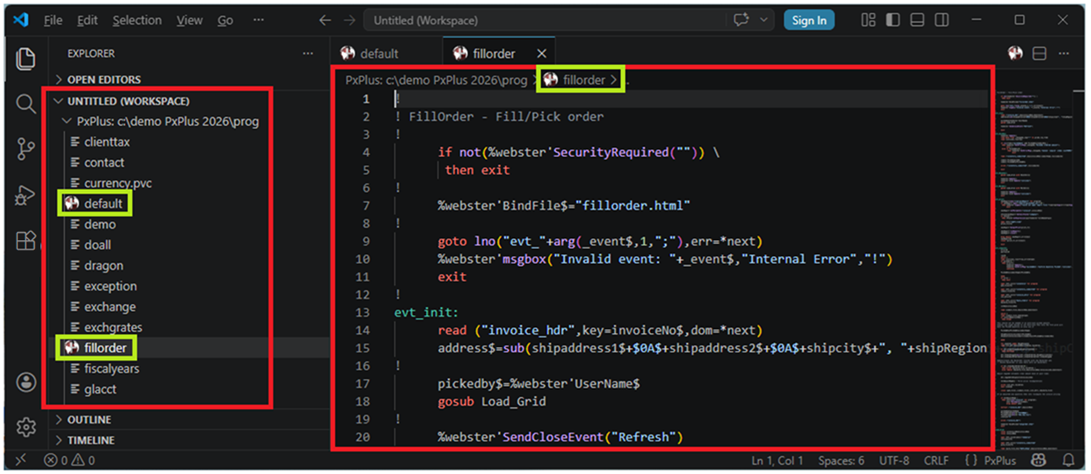
3. |
The selected directory is displayed in the Explorer view on the left where you can select the program to edit. Note:
|
|
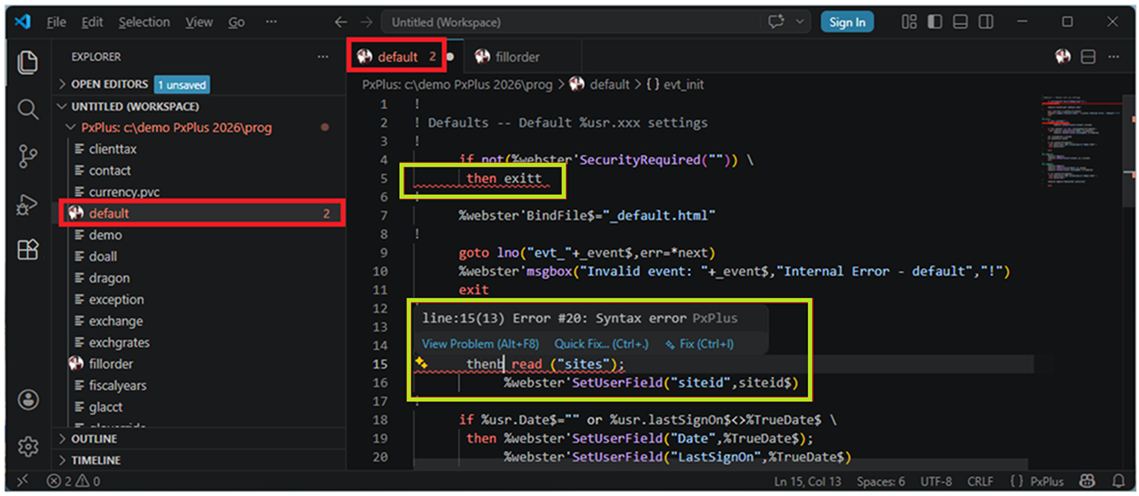
4. |
Syntax errors are identified with a wavy line, and the number of errors is displayed beside the program name. In addition, hovering over the error displays a dialog with additional details about the error. |
These steps show you how to create a new PxPlus program:
|
1. |
To create a new program and add it to your directory, see Create New PxPlus Programs. For this example, click the PxPlus icon in the upper right corner. From the displayed list, select Create a PxPlus Program. |
|
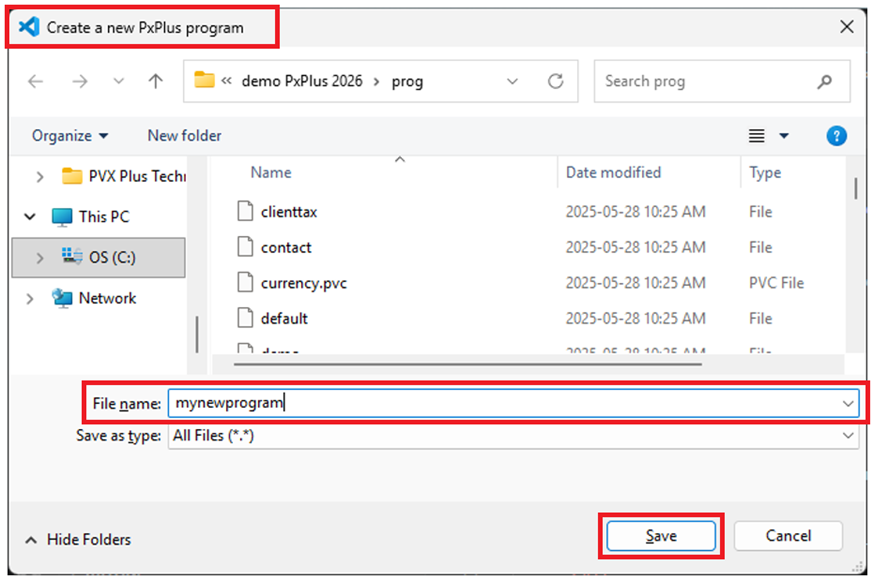
2. |
The Create a new PxPlus program window is displayed. Enter the File name of the new program and click Save. |
|
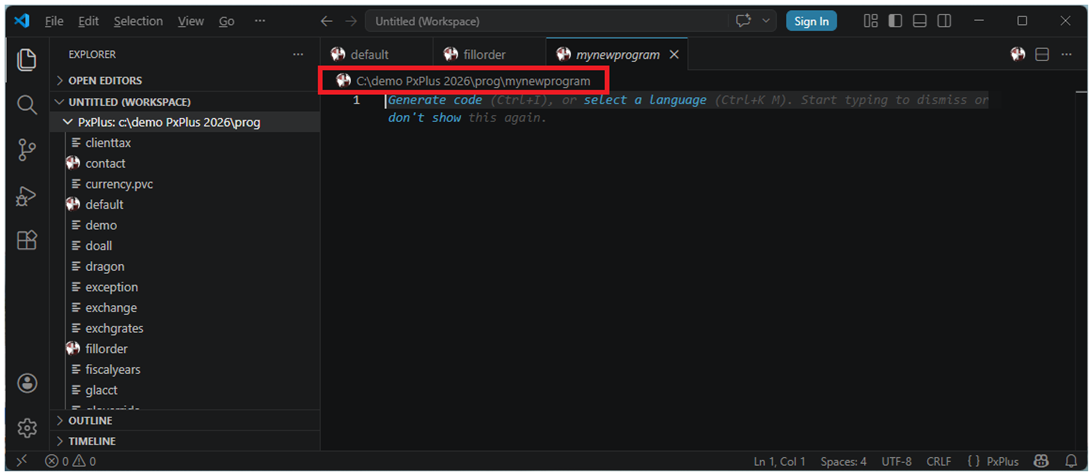
3. |
You can now create the new PxPlus program. For example, you can simply start typing: |
PxPlus Visual Studio Code Extension