1.
Find Your System Information
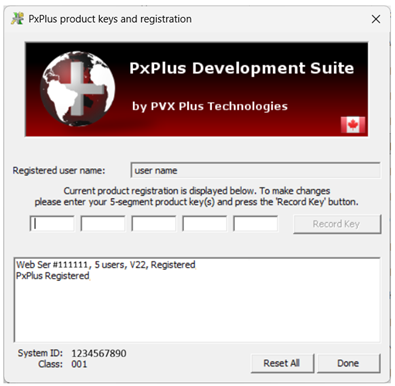
Before contacting PVX Plus Support, find your System ID, Class, Serial Number and User Count for the system on which PxPlus is installed.
To do this, use one of the following methods (depending on the operating system):
|
Windows: |
Open the pxpwactv.exe file in the PxPlus installation directory
|
|
UNIX/Linux: |
Enter this command: pxpreg -v |
2.
Submit a Helpdesk Ticket
Submit a Helpdesk ticket to PVX Plus Support at https://helpdesk.pvxplus.com. Select the Open a New Ticket button or menu bar option.
Enter your support request and include the following:
- A valid email address
- Your full name
- System ID
- Machine Class Number
- PxPlus product Serial Number that you want to move to a new system (Do not include license Activation Keys)
Important Note:
To help resolve your issue as quickly as possible, all requested information must be provided. Missing details will result in delays.
After receiving and verifying the request, PVX Plus Technologies validates and initiates the process on their key registration system and contacts you when you may proceed with the transfer.
3.
Run Online Registration
On the system you are de-installing PxPlus, run the Online Registration (when connected to the internet).
If the system is not connected to the internet or if you are unable to complete the online registration, you must complete the Manual Activation process. An administrative fee may apply for licenses not enrolled in the Continuous Care Program (CCP) and for unsupported versions.
4.
Note the Expiry Date
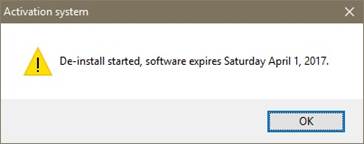
After running the online registration, you should see a message similar to the one below. Make a note of the expiry date, as the software on the current system will terminate on that date.
5.
Install PxPlus on the New System
Install PxPlus on the new system and enter the Activation Key.
For Windows, see Download and Installation (Windows).
For UNIX/Linux, see Download and Installation (UNIX/Linux).
6.
Launch PxPlus on the New System
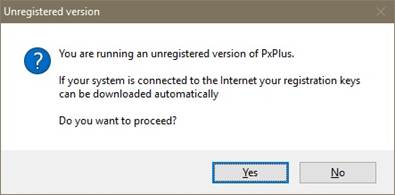
On the new system, launch PxPlus. You should see a message similar to the one below. Select Yes.
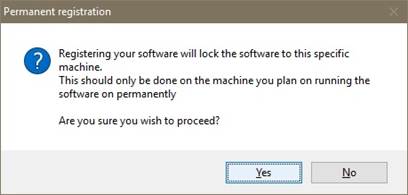
7.
Confirm Permanent Registration on the New System
You should see another message similar to the one below asking you to confirm that you want to register the software. Select Yes.
8.
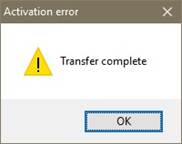
Receive Confirmation
Another message displays to confirm that the transfer of the PxPlus registration is complete.