|
Panel Layout Utility |
The Panel Layout Utility provides the ability to apply panel layout changes to multiple panels simultaneously, either for a particular library or for multiple libraries within the same directory. Using this utility not only reduces the amount of time needed to apply panel changes, but also applies the changes consistently across all selected panels.
(The Panel Layout Utility was added in PxPlus 2014 - Feature Pack 1.)
This utility provides the ability to:
To invoke this utility, use one of the following methods:
|
Location |
Method |
|
From the PxPlus IDE Main Launcher |
Expand the Graphical Application Builder (Nomads) category. Then, expand the Utilities category and select Panel Layout Utility. |
|
From the NOMADS Session Manager |
From the Utilities menu, select Panel Layout Utility. |
The main dialog consists of the following:
|
Type |
Type of processing to be performed:
In the adjacent field, enter the full pathname of the library or directory to be processed or use the Query button. For each NOMADS library processed, a backup of the original library is automatically created, which contains the library panels in their original format. The naming format for the backup library is lib_name.bak, where lib_name is the name of the original library including the extension. This file is used by the Revert .BAK Libraries option (on the Include drop box), which allows you to back out the most recent panel layout changes and put back the library's original panels. See Reverting .BAK Libraries below. Example: Original library: Customers.en Note: | ||||||||
|
Include |
Specifies additional details for the processing of the panel layout changes. Selections are:
| ||||||||
|
Reset |
Clears the current entry and puts all the options back to their default settings. | ||||||||
|
Next |
Displays the Panels tab. | ||||||||
|
Exit |
Cancels the current entry and closes the utility. |
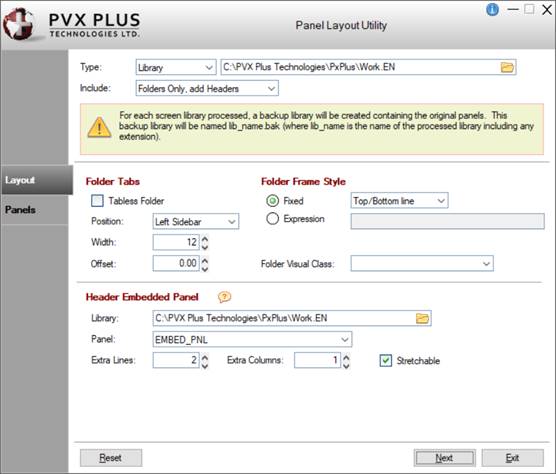
The Layout tab consists of the following:
|
Folder Tabs |
| ||||||||||
|
Folder Frame Style |
| ||||||||||
|
Header Embedded Panel |
|
Select the Next button to go to the Panels tab.
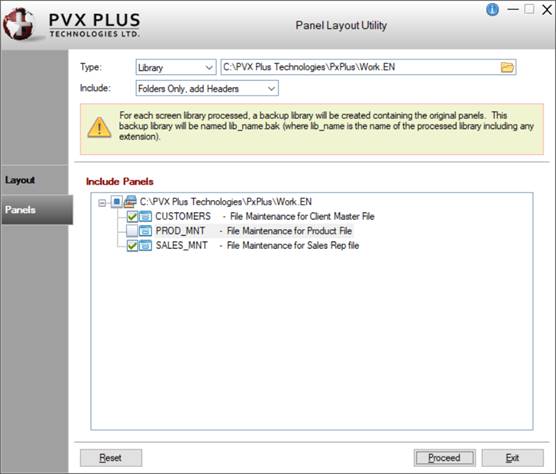
The Panels tab consists of the following:
|
Include Panels |
Displays a tree view that lists all the panels for each library that corresponds with the specified Type (Library or Directory) and path entered. Libraries, Windows and Dialogs are indicated by their standard bitmaps. Note: |
|
Proceed |
Launches the Panel Layout process for the selected panels. |
After choosing the panels to include/exclude, select the Proceed button to process the panel layout changes. The changes, as specified on the Layout tab, are applied to the panels selected on the Panels tab.
Once this process has finished applying the changes to all the selected panels and no errors were encountered, a "Processing complete" message displays to indicate that the changes were successful. Clicking OK on this message clears only the library/directory pathname at the top of the main dialog. All other selections remain intact to allow you to run the utility again for a different library using the same settings and Layout selections. If you do not want to re-use the same settings, select the Reset button to clear your previous selections and return to the default settings. When you are done, you can review the panel changes in NOMADS and make any post-processing adjustments, if necessary.
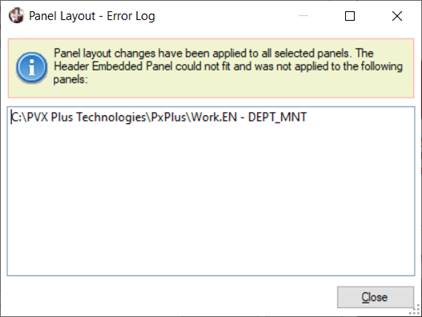
If the process encountered errors after applying the changes to all the selected panels, an Error Log displays. These errors occur when the Header Embedded Panel you had selected to insert does not fit on one or more of the selected panels. The error log lists those panel(s) from which the embedded panel was omitted for this reason.
To resolve this error, use one of the following methods:
|
|
Make the necessary size adjustments to the embedded panel and/or the panels listed on the error log. Then, run this utility again for only those panels on the error log by using the Panels tab to make your selections. |
|
|
Manually insert the embedded panel into each panel listed on the error log. |
|
|
Reverse the panel layout changes that were applied to all the panels, including those not listed on the error log. To do this, select Revert .BAK Libraries from the Include drop box. See Reverting .BAK Libraries below. After that, make the necessary size adjustments, and then run this utility again for all the panels in the library. |
The Revert .BAK Libraries option (on the Include drop box) is used to back out the most recent panel layout changes and put back the library's original panels using the .bak file created during the processing of the panel layout changes.
The steps below guide you through the revert process:
|
Step |
Description | ||
|
1. |
From the Include drop box, select Revert .BAK Libraries. Selecting this option first allows the utility to filter the Query list, as well as the list on the Panels tab, to display backup library files (.bak), rather than all library files, for easier file selection. | ||
|
2. |
From the Type drop box:
| ||
|
3. |
In the input control adjacent to the Type drop box, specify the location for the Library or Directory. If the Type selected is Library: Use the Query button to select a particular .bak file corresponding to the library you want to revert. Example: To revert the panel changes for the library Customers.en, you would select its backup file Customers.en.bak. If the Type selected is Directory: Use the Query button to select the source directory that contains the .bak file (or files) corresponding to the library (or libraries) you want to revert. | ||
|
4. |
The options on the Layout tab cannot be changed. | ||
|
5. |
Select the Next button to display the Panels tab. The Include Panels list displays only .bak files, one for each "processed" library stored in the path previously entered. All the .bak files are selected by default for the revert process, but you can deselect the check box beside the file(s) that you do not want included in this process. If no .bak files are listed, this indicates that the library or directory specified in step 3 does not contain any .bak files. As a result, the revert process cannot be performed. | ||
|
6. |
Select the Proceed button. A message displays when the processing is complete. At this point, the contents of the .bak files are restored to the original library, and the .bak files are removed. | ||
|
7. |
Review the panels in NOMADS to verify that they have been restored to their previous state, prior to processing the last panel layout changes. |