|
Wizard Creation Wizard |
The Wizard Creation Wizard is a PxPlus utility that uses a five-step process to guide developers through the creation of the fundamental navigation components of a wizard. See Wizard Creation Wizard Steps.
Upon completion of this process, the basic structure for the wizard is defined, which consists of a short wizard program and a series of blank library panels. To make this into a fully operational wizard, the remaining details must then be completed, which is to add the necessary programming and screen changes.
(The Wizard Creation Wizard was added in PxPlus 2016.)
To invoke the Wizard Creation Wizard, use one of the following methods:
|
Location |
Method |
|
From the PxPlus IDE Main Launcher |
Expand the Graphical Application Builder (Nomads) category. Then, expand the Utilities category and select Wizard Creation Wizard. |
|
From the NOMADS Session Manager |
From the Utilities menu, select Wizard Creation Wizard. |
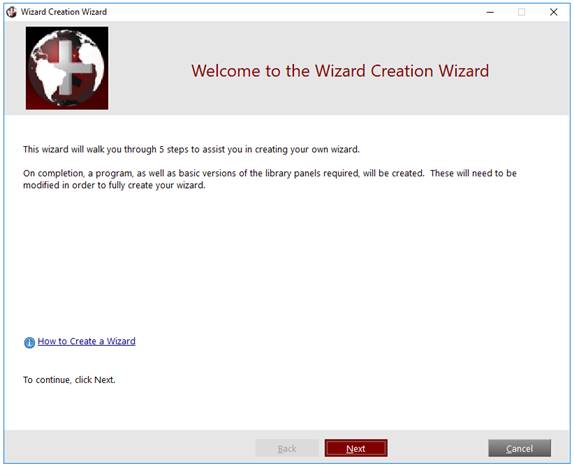
The Welcome panel provides general information about the Wizard Creation Wizard and a Help link for creating a wizard.
Click Next to proceed to Step 1: Names and Locations. The wizard panel for each step consists of three sections:
|
This section extends across the top of the panel and lists the five steps for creating a wizard. A white step number against a dark red background indicates the current step being defined. A gray step number against a gray background indicates that the step is temporarily unavailable until required information has been entered first. The step number will change to white when that step becomes available for entry. Clicking on a step number will go directly to that step without having to select intermediate steps in order. This is useful when reviewing or changing previous selections before exiting the wizard. Keep in mind that certain steps may require data before advancing to subsequent steps. | |
|
Work Area |
This section is the body of the panel and consists of fields used for processing each step. |
|
Navigation Bar |
This section extends across the bottom of the panel and consists of buttons for moving through the steps. |
Define the wizard and the program names and locations.
Configure the Welcome and Finish pages.
Define the appearance of the elements in the step (top) section.
Configure the text for the step buttons and titles.
Review the summary and create the wizard.
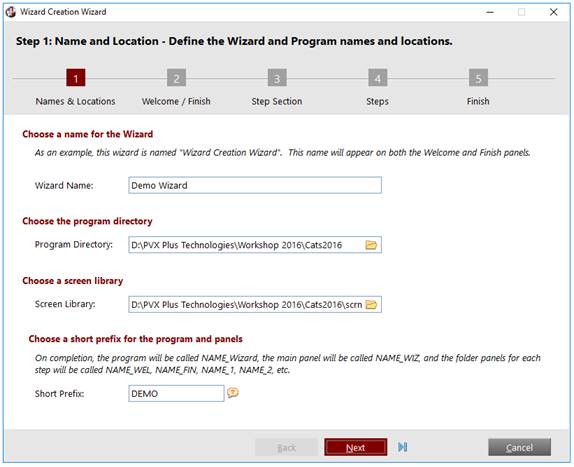
Enter a Wizard Name, followed by the Program Directory, Screen Library and Short Prefix that will be used by the utility to create the necessary files for the completed wizard. When you are ready to proceed to the next step, click Next.
This panel consists of the following:
|
Choose a name for the Wizard | |
|
Wizard Name |
(Required) Enter a name for the wizard. This name will display at the top of the Welcome and Finish panels of the new wizard after it is created. Example: |
|
Program Directory |
(Required) Specify the full pathname to the directory in which the completed wizard program is to be placed. Click the Browse button to navigate to the desired directory or type the full pathname. |
|
Screen Library |
(Required) Specify the library file in which the completed wizard panels are to be placed. If the library file is located in the same directory as the Program Directory specified above, a simple screen library name can be entered. If the library file is in a different location, the full pathname must be specified by clicking the Browse button or typing the full pathname. Note: |
|
Choose a short prefix for the program and panels | |
|
Short Prefix |
(Required) Enter a short prefix (up to 8 characters) that will precede the names of the completed wizard program and wizard panels. Valid characters are letters A to Z and numbers 0 to 9. Special characters are not allowed. Example: |
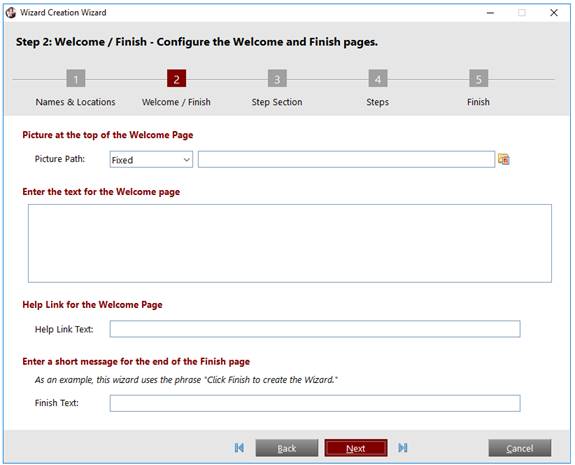
Define the options for customizing the Welcome and Finish pages for the completed wizard.
This panel consists of the following:
|
Picture at the top of the Welcome Page | |
|
Picture Path |
Specify the full pathname to the image file or corresponding expression for the image that can be optionally included on the Welcome page. This image will display in the upper left corner of the Welcome page. If you Open the Library File in NOMADS and view the completed wizard panel, it will contain an image type control named WELCOME_IMAGE. If Picture Path is blank, then no image control will be created. Upon completion of the wizard, the image entered will be scaled and dynamic. See Image Properties. |
|
Enter the text for the Welcome page | |
|
Enter the text to display on the Welcome page. | |
|
Help Link for the Welcome Page | |
|
Help Link Text |
Enter the text to display on a Web-style Help link button that can be optionally included on the Welcome page. If you Open the Library File in NOMADS and view the completed wizard panel, it will contain a button type control named BUTTON_HELP. If the Help Link Text is blank, then no button control will be created. Note: |
|
Enter a short message for the end of the Finish page | |
|
Finish Text |
Enter the text to display at the bottom of the Finish page. Example: |
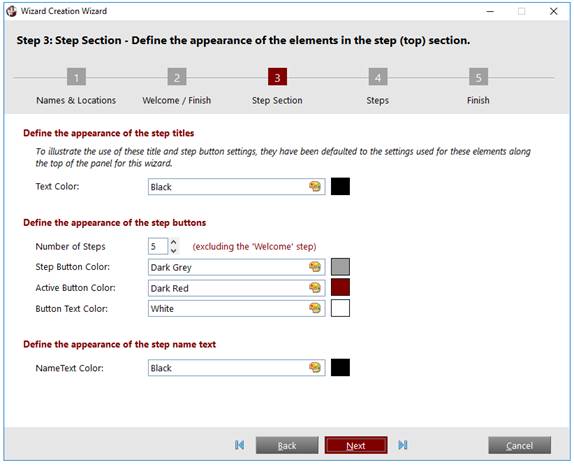
Define the options for customizing the Progress Bar section at the top of the wizard panels. To illustrate what part of the progress bar section is affected by each of these options, these options have been defaulted to the same settings used in the Wizard Creation Wizard utility.
Example:
The Active Button Color defaults to Dark Red, which is also the color used by the Wizard Creation Wizard utility to indicate the active step (Step Section 3) in the progress bar section.
This panel consists of the following:
|
Define the appearance of the step titles | |
|
Text Color |
Color to use for the step titles that describe each step at the top of the panel. |
|
Define the appearance of the step buttons | |
|
Number of Steps |
Number of total steps/pages (not including the Welcome page) that will be needed to create the wizard for the applicable task. The number of steps depends on the complexity of the task for which the wizard is being created. Valid values are from 2 to 8 steps. Note: |
|
Step Button Color |
Background color to use for the step buttons in the Progress Bar section. |
|
Active Button Color |
Background color to use for the active step button. As the user progresses through each step, the corresponding step button in the Progress Bar section will change to this color. |
|
Button Text Color |
Color to use for the number (text) displayed inside the step buttons in the Progress Bar section. Note: |
|
Define the appearance of the step name text | |
|
Name Text Color |
Color to use for the name text that displays below the step buttons in the Progress Bar section. |
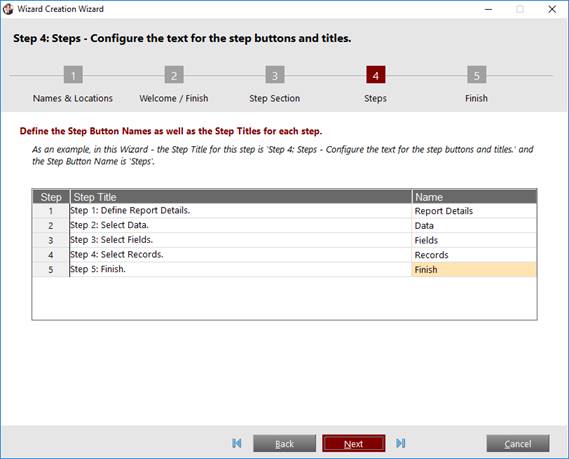
Define the text to display as the step name under each step button in the Progress Bar section, as well as the text to display for each step at the top of each panel. The name of the final step defaults to Finish, but this can be changed.
This panel consists of the following:
|
Define the Step Button Names as well as the Step Titles for each step. | |
|
Step |
Number of the step being defined. (This field is locked.) |
|
Step Title |
Enter the text that describes each step. This text will display at the top of the panel for that step. A maximum of 150 characters can be entered. Note:
|
|
Name |
Text to display below each step button. A maximum of 25 characters can be entered. Note: |
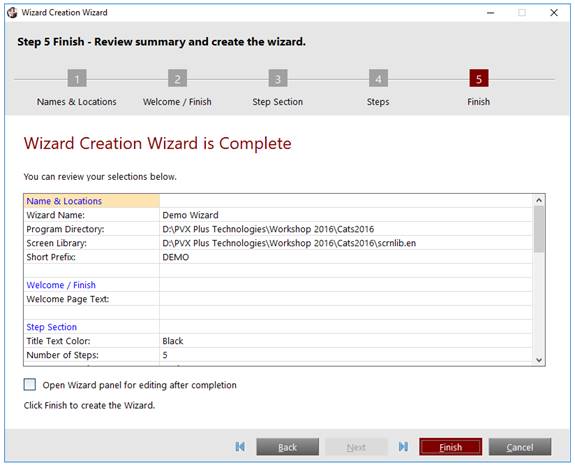
Review the selections for the previous steps, which are presented in a grid format with a vertical scroll bar.
To change any previous selections, navigate to the applicable step(s) by using the Back/Next buttons or by clicking the numbered Step button in the Progress Bar section.
To launch the main Wizard panel (i.e. NAME_WIZ) in the NOMADS Panel Designer after completing the Wizard Creation Wizard utility, select the Open Wizard panel for editing after completion check box prior to clicking the Finish button.
When the Finish button is selected, a wizard program is created in the directory specified in the Program Directory field (see Program Directory). At the same time, NOMADS panels are created for the wizard and all the steps in the library file specified in the Screen Library field (see Screen Library).
With the basic structure for the wizard created, the wizard program and panels are ready to be modified as needed to customize the wizard's appearance and complete its functionality.