|
Setup and Installation |
|
TortoiseSVN software and documentation can be downloaded from various Web sites. If you have already installed TortoiseSVN, be sure that it is Version 1.4 or later in order to work correctly with the PxPlus Version Control System.
TortoiseSVN is a Windows client that can access a repository set up locally using the TortoiseSVN>Create repository here option from the Windows Explorer popup menu or a remote Subversion (SVN) repository. The repository must be created before attempting to import files.
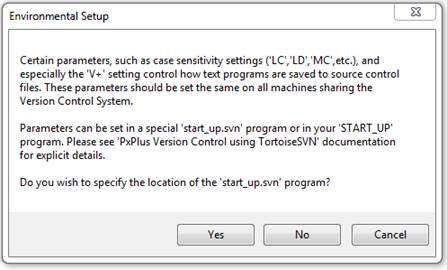
It is important that programs be saved in a consistent manner in the source directory and repository to ensure that programs marked as "changed" do, indeed, have valid changes, and to facilitate comparisons between different program versions. Some parameters, such as case sensitivity settings ('LC', 'LD', 'MC', etc.), can have an effect on how your programs are saved. It is important that parameters be set the same on all machines sharing the Version Control System.
The 'V+' parameter can be used to control how the text of programs will be 'saved' into the source control files. Its value consists of a mask comprising of the following:
|
0 |
SVN source will use lower case variables and directives and suppress LET. (Default) |
|
1 |
SVN source will use upper case variables and directives and suppress LET. |
|
2 |
SVN source will use the 'LD', 'LC' and 'NL' parameters in effect. |
|
+4 |
Adding 4 to the value of 0, 1 or 2 will force the format of a SAVE to a serial file to match that of a standard SAVE. |
If 'MC' is set, this will override the case settings for variables.
There are two ways to set environmental parameters for the Version Control System. One is to set the parameters in your START_UP program. Be aware that, while certain aspects of the Version Control System run in your current PxPlus session, there are some tasks that are spawned. If you set your parameters in your START_UP program, be sure there is a START_UP program for both your current session, as well as the spawned sessions (in the directory where the pxplus executable is located).
The other method (available as of PxPlus v11.50) involves creating a start_up.svn program to set/reset environment parameters whenever the Version Control System does an extract (from the application to source directory) or an update (from the source to the application directory). The start_up.svn program is called with no arguments by the Version Control System prior to the extract or update. If you wish to reset the parameters when the extract or update is complete, you can include a start_up.svn;Reset label in the program, which is called at the conclusion of the extract or update. Place the start_up.svn program in the same directory you will specify as the Starting point directory when you checkout the application from the repository. On the initial import, you will be prompted for the location of the start_up.svn.
The first step in importing an application into the repository is the job of the Version Control System administrator. First, prepare an application directory with all the sub-directories, tokenized programs, screen libraries, data files, resource files, etc. that are to be included.
Programs and libraries will automatically be converted to a text format for import and resource files will be copied as-is; however, native PxPlus data files will be copied as-is unless specifically flagged to undergo conversion to text format. If your application has data files for which you would like to track development changes, you can flag it for text conversion by selecting the Convert to Text for Version Control System check box for the file definition in Data Dictionary Maintenance. (You can also flag the data file for conversion later, after the Version Control System is set up, using the SVN TEXTON command.)
Next, start PxPlus and check your parameter settings, as described above.
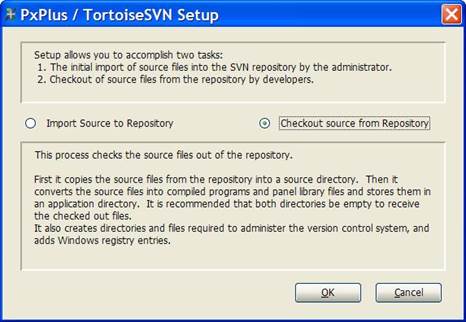
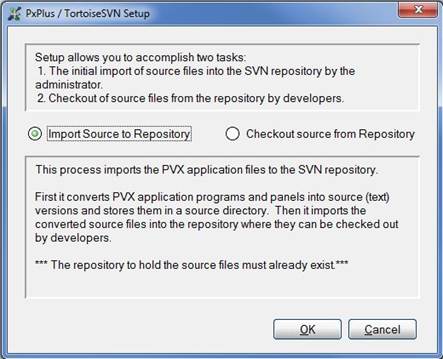
Finally, to import the application, invoke the PxPlus TortoiseSVN Setup utility from the PxPlus base window Utility menu, from the Version Control menu in the *IT - Integrated Toolkit or Ed+, or by using the SVN SETUP command program.
Select the Import Source to Repository option.
You will be given the option to specify the location of the start_up.svn program to set up your PxPlus environment.
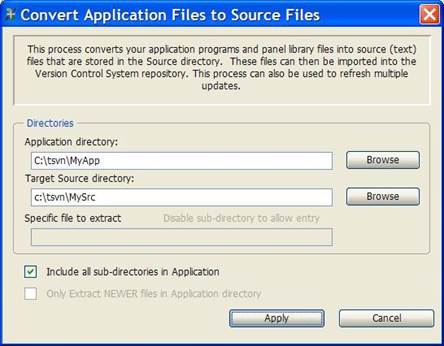
You must enter the main path of the Application directory that contains the programs and files that you wish to import into the repository. You must also enter the main path of the Source directory where the source files will be stored. The directory will be created if it does not exist. This directory will be loaded with the text version of the programs and panel directories and files, etc. that will ultimately be imported into the repository.
When the Apply button is clicked, the Version Control System extracts the files from the application directory and converts programs, screen library files and flagged data files into the proper format for the source directory and copies the rest of the files into the source directory. Program files will have a .pxprg extension, while a directory will be created for each screen library file, containing individual panel definition files with a .pxpnl extension. Converted data files have a .pxdat extension.
When a password protected program or data file is encountered, the system will prompt for the password. If you give it the proper password, the program or file will be converted to plain text and copied with its password header. If you do not supply the password but click the Copy Asis button, the program or file will be copied in binary form. The extraction process maintains a list of passwords you supply and tries the same passwords on subsequent programs. This means that if multiple programs have the same password, you will only be prompted once.
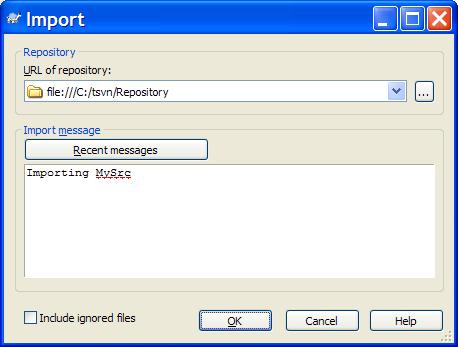
When the extraction process is complete, the TortoiseSVN Import procedure is automatically initiated to import the contents of the newly loaded source directory into the repository.
Enter the URL of the repository and any notes you wish to record and click OK. When the import procedure has ended, the repository will hold the contents of the source directory, ready to be checked out and used by the development team.
For most users, this is the only setup step required. While the import procedure is performed once by just the administrator, the Checkout step is performed once by all developers involved in writing the application. This step creates source and application directories using the latest versions of the files in the repository.
To checkout the application, start PxPlus and check your parameter settings. See Setting Up the PxPlus Environment for parameter settings.
Then, invoke the PxPlus TortoiseSVN Setup utility from the PxPlus base window Utility menu, from the Version Control menu in the *IT - Integrated Toolkit or Ed+, or by using the SVN SETUP command program.
Select the Checkout source from Repository option.
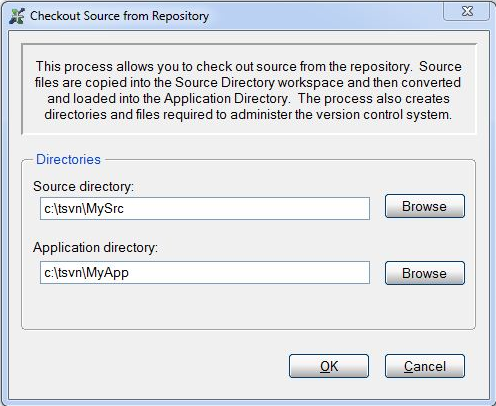
Identify the source and application directories. If they do not exist, they will be created. These directories should be empty for the checkout procedure, although it is not necessary.
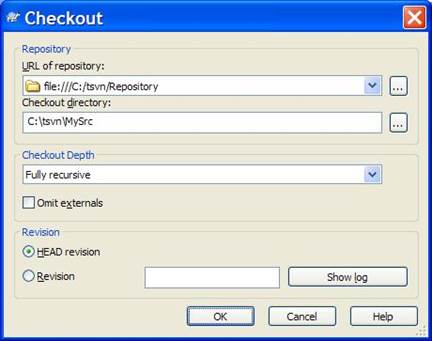
When you click Apply, the TortoiseSVN Checkout procedure is invoked.
Enter the URL of the repository and identify the Checkout directory (i.e. Source directory). This procedure will copy the latest version of the source files into the source directory. It will also create administrative files required by TortoiseSVN to manage the files.
When TortoiseSVN has finished the checkout, the Version Control System will proceed to update the Windows registry with new file types, .pxprg and .pxpnl, for PxPlus programs and panel definitions. This allows files in the source directory that have these extensions to be invoked with the proper editor or open procedure.
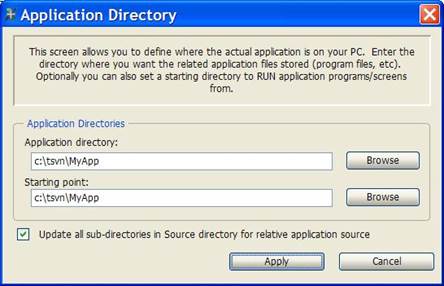
The Version Control System then adds some administrative files to source and application directories needed to manage the files. It preloads the name of the application directory, and you are given the option to supply a starting point from which to run the application. The starting point is also the location of the optional start_up.svn program that can be used to set up environmental parameters described above. See Setting Up the PxPlus Environment.
TortoiseSVN hook scripts that integrate SVN commit and update functionality with PxPlus Version Control System procedures are added to Windows registry entries.
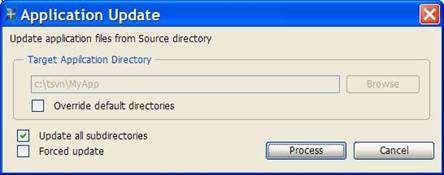
The Version Control System then begins the procedure to add the files to the application directory.
When the Application Update procedure is finished, the checkout is complete.
Using the Version Control System