Projects How To Tutorials
|
How to Use Projects from the NOMADS Session Manager | |
Starting with PxPlus 2025, projects can be used from the
NOMADS Session Manager. This provides another way to access and work with projects besides the
PxPlus IDE. Projects provide a method for organizing and managing the various tasks and settings used in the development of business applications.
Each project requires a working directory and a settings file. The settings file is used to save project settings and the data that defines the project contents. Each project has its own settings file. The same settings file can be shared with multiple projects. The Default project uses the standard nomads.ini file, which can be shared with other projects.
Various tasks and settings within PxPlus can be saved by project. For information on the tasks and settings that can be saved, see
Working with Projects.
How to Set a Project
These steps show you how to set a project from the NOMADS Session Manager.
|
1. |
From the PxPlus Command line, enter nom to invoke the NOMADS Session Manager.
 |
|
2. |
The NOMADS Session Manager displays. The blank space to the right of the menu bar indicates that no project has been set.
From the menu bar, select Projects > Set Project.
 |
|
3. |
The Select Project dialog displays.
 |
|
4. |
From the Project drop box, select the project. Click OK to set the project.
 |
|
5. |
The selected project (i.e. Demo) displays to the right of the menu bar, indicating that this project has been set.
 |
|
6. |
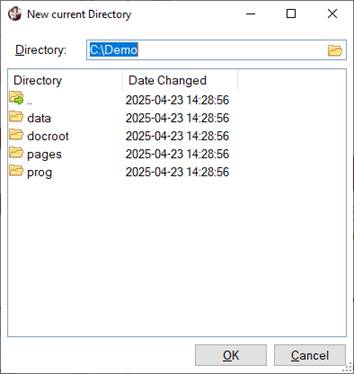
Setting a project also sets the current directory, which will be used as the working directory for the project. To view the current directory, select Options > Change Directory from the menu bar.
Tasks are launched in the proper working environment based on the working directory for the project.
 |
How to Create a Project
These steps show you how to create a project from the NOMADS Session Manager.
|
1. |
In the NOMADS Session Manager, a new project can be created by using one of the following methods:
Method 1:
From the menu bar, select Projects > Set Project.
The Select Project dialog displays. To create a new project, click the button to the right of the drop box.
OR
Method 2:
From the menu bar, select Projects > Create Project.
 |
|
2. |
The Create Project dialog displays.
 |
|
3. |
Enter the details for the new project. See
How to Create a Project. |
|
4. |
Click OK to create the new project. |
In the NOMADS Session Manager, the Project menu consists of the following additional tasks:
|
Edit Project |
Displays the Edit Project dialog for modifying the project information. See
How to Edit a Project. |
|
Delete Project |
Displays a message that asks you to confirm that you want to delete the current project. See
How to Delete Project. |
|
Copy Project |
Displays the Copy Project dialog for copying an existing project to a new project. See
How to Copy a Project. |
|
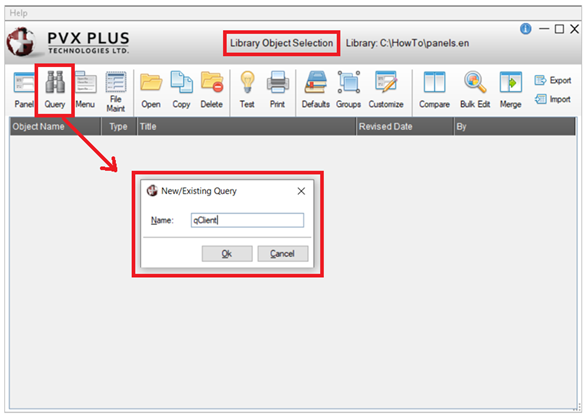
Open Project Library |
This task opens Library Object Selection for the Default Library defined for the current project. A default project library is useful when you are often working with the same library.
If no default library was defined, a message will display. |
|
Project Maintenance |
Displays the
Project Maintenance dialog for adding various types of tasks to the selected project. |
See Also
Working with Projects
IDE Main Launcher
Adding Tasks to Projects from Other Locations