|
Extended Class Validation and Display |
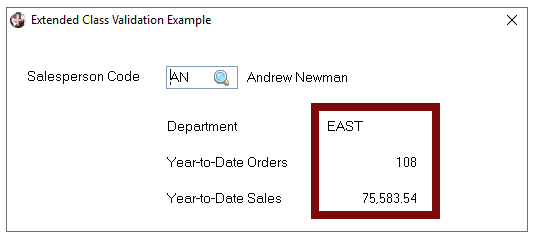
Extended Validation is used to provide additional table validation and allow access to data elements for creating display-onlyMulti-Line controls when designing NOMADS panels. At run time, when a valid value is entered, the Extended Validation Multi-Line controls are populated with existing data from the table.
To define Extended Validation, access the Validation tab for a Multi-Line Data Class.
See the tutorial How to Use Extended Class Validation and Display.
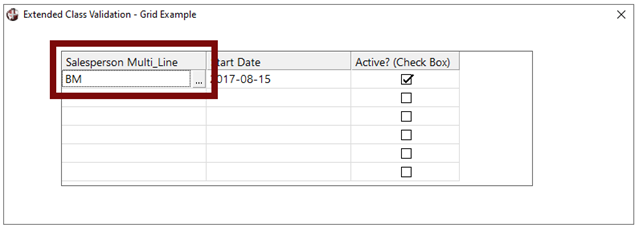
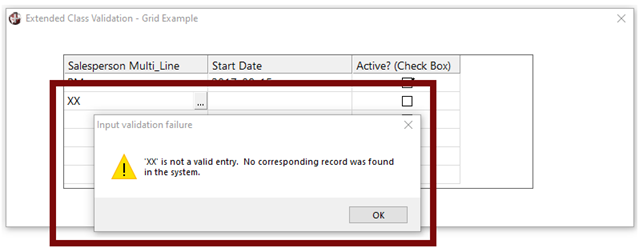
When working with Grids in the NOMADS Panel Designer, a data class can be assigned in Grid Presets Definition by selecting the Class property. If assigning a Multi-Line data class that has Extended Validation, additional table validation will be provided at run time when a value is entered.
(Extended Validation was added in PxPlus 2019.)
(Support for Extended Validation in Grids was added in PxPlus 2019 Update 1.)
The following two examples include detailed steps on how to define Extended Validation and how it is subsequently used with Multi-Line and Grid controls when designing a NOMADS panel.
|
|
|
|
|
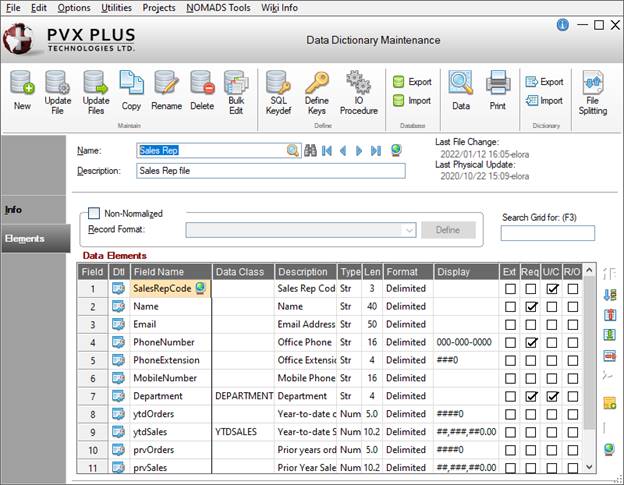
Both examples use the Sales Rep table, which consists of the data elements below.
|
|
|
This example includes the following steps for defining Extended Validation, creating Multi-Line controls and viewing run-time examples of a NOMADS panel:
To begin:
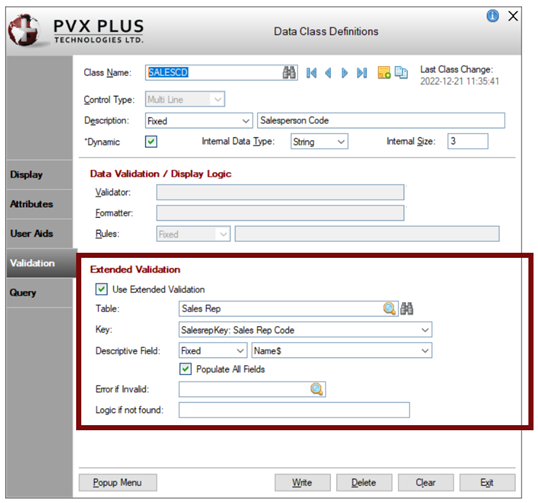
Step 1: Create a Multi-Line Data Class with Extended Validation
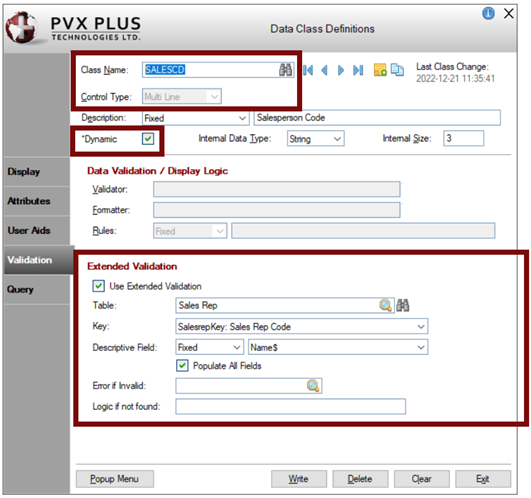
In Data Class Definitions maintenance, create a Multi-Line data class. Name it SALESCD and select the Dynamic check box.
On the Validation tab, select the Use Extended Validation check box. Enter the Extended Validation settings below.
|
|
|
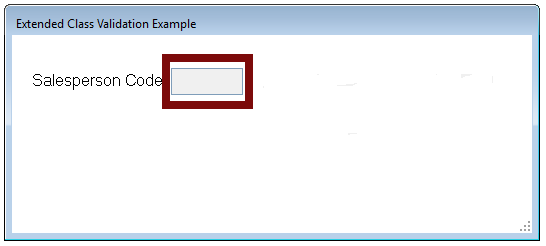
Step 2: Create a Multi-Line Control with the Extended Validation Data Class
In Step 1, SalesrepKey: Sales Rep Code was selected for the Key. This is the value to be validated.
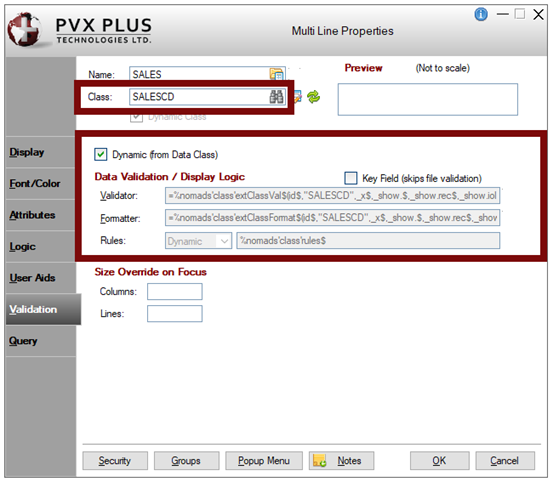
On the NOMADS panel, create a Multi-Line control with the Extended Validation data class. Name the Multi-Line control SALES and for the Class, enter SALESCD.
|
|
|
|
|
Note: |
|
|
|
Step 3: Create a Multi-Line Control for the Descriptive Field
In Step 1, Name$ was selected for the Descriptive Field. This allows the Name data element to be available when designing the panel.
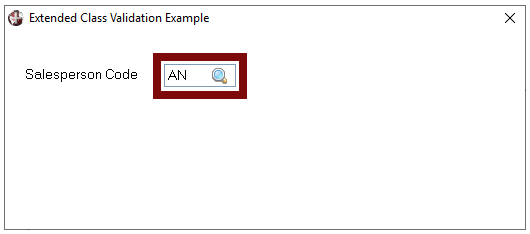
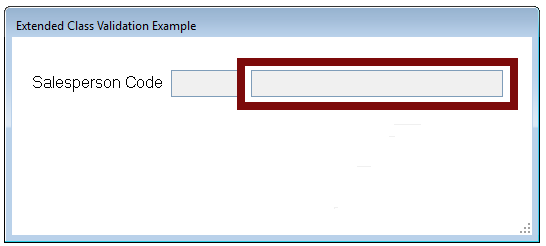
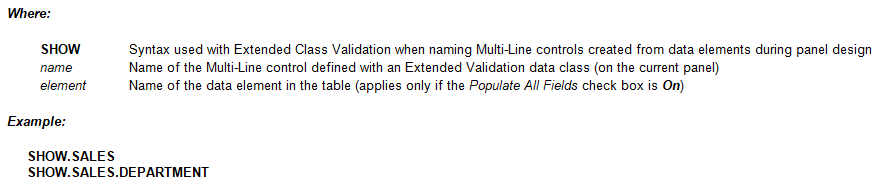
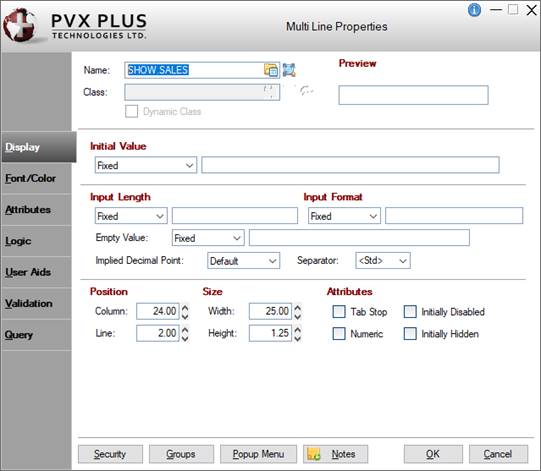
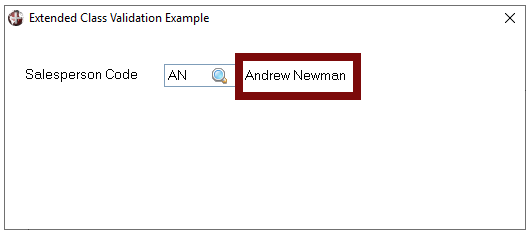
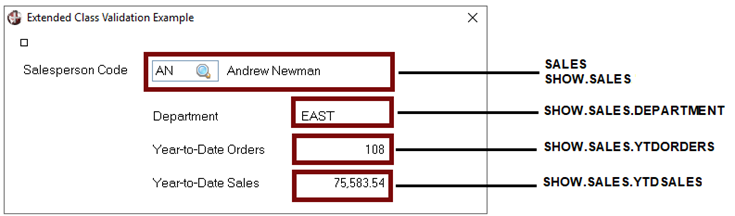
On the same panel, draw another Multi-Line control. Name it SHOW.SALES. This Multi-Line control will automatically display the Salesperson's Name when a valid Sales Rep Code is entered.
|
|
|
| ||
|
|
Important Note: | |||
|
|
|
| ||
Step 4: Create Multi-Line Controls for Other Data Elements
In Step 1, the Populate All Fields check box was selected. This allows all data elements to be available when designing the panel.
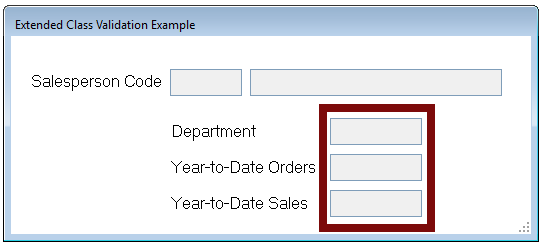
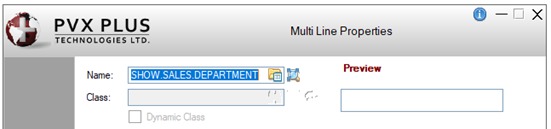
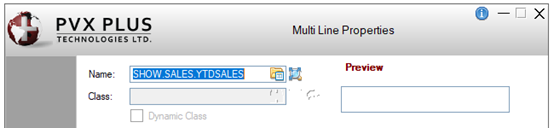
On the same panel, draw Multi-Line controls for the three data elements below, using the names provided. These Multi-Line controls will automatically populate with data when a valid Sales Rep Code is entered.
|
|
Data Element |
Multi-Line Control Name | |||
|
|
Department$ |
SHOW.SALES.DEPARTMENT | |||
|
|
ytdOrders |
SHOW.SALES.YTDORDERS | |||
|
|
ytdSales |
SHOW.SALES.YTDSALES | |||
Note: | |||||
|
|
|
| |||
|
|
|
| |||
|
|
|
| |||
Step 5: Panel Recap
The end result is a panel created with the following Multi-Line controls for Extended Validation:
|
|
|
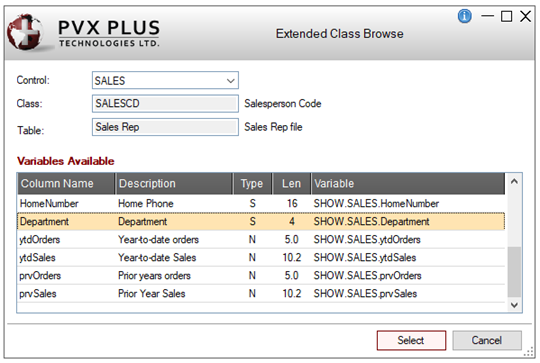
To make it easier to create Multi-Line controls for Extended Validation data elements, the Extended Class Browse can be used. It shows a list of all the table data elements that can be added to a panel. When a data element is selected, the appropriate Multi-Line properties, including the Name, are defined.
|
|
|
|
|
This example includes the following steps for defining Extended Validation, adding the Extended Validation data class to a Grid and viewing run-time examples of a NOMADS panel:
To begin:
Step 1: Create a Multi-Line Data Class with Extended Validation
If desired, a new Multi-Line data class can be created by following Step 1 of the above example.
Since a Multi-Line data class (SALESCD) with Extended Validation was previously created, it will be used for this example. Proceed to Step 2.
|
|
|
Step 2: Add the Extended Validation Data Class to Grid Presets Definition
When SALESCD was created, SalesrepKey: Sales Rep Code was selected for the Key. This is the value to be validated.
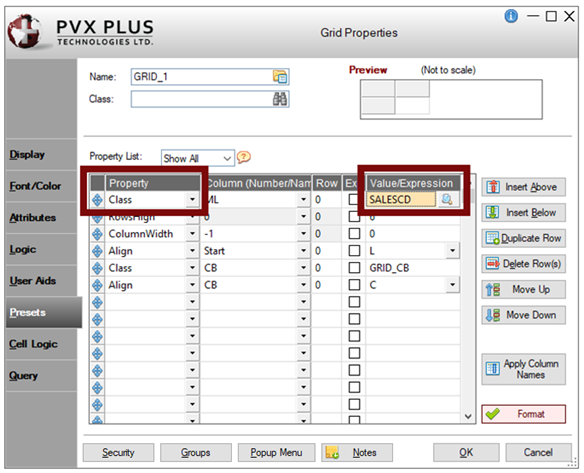
On the NOMADS panel, create a new or select an existing Grid control. In the Grid Properties dialog, select the Presets tab.
In the Property column, select Class from the drop-down list. Specify the desired Column/Row that will be used to enter the value to be validated. In the Value/Expression column, select the SALESCD class from the query.
|
|
|
Populate from Data Source
File Maintenance Generator