|
Webster+ Setup and Configuration |
Webster+ can be run in a variety of environments using the Apache Web server, the PxPlus EZWeb Server or IIS. It is included with the PxPlus Web bundle and provides not only the logic to generate dynamic Web pages but also a security system, file upload/download utilities, email and SMS interfaces, a menu system, as well as a variety of setup/configuration tools.
See Frequently Asked Questions for answers to some commonly asked questions about Webster+.
While you can install and setup Webster+ a number of ways, the key, however, is the webster.pxp program, which is used as the root program of all Webster+ processing. A basic webster.pxp program is provided in the system *webster directory (*webster/webster.pxp).
This program is invoked by all Webster+ requests and is responsible for establishing the Webster+ environment, such as global variables and any other settings you may require.
The default webster.pxp is as follows:
! Generic server module for *obj/webster binder
! Modify this for setting global variables and any webster initialization you want
! As of PxPlus 2021 (v19), prefixes should be set in start_up.web in order to
! handle the Wiki interface
!
! Then run "*webster/webster"
!
RUN "*webster/webster"
The start_up.web program defines the location of the data files, pages and programs through the use of the PREFIX directive.
The default start_up.web is as follows:
! Standard start_up for Webster -- sets the prefix rules
! Setting the prefix here allows the WIKI system to use the same search rules
!
PREFIX "../data/ ../pages/"
PREFIX PROGRAM "../prog/"
Typically and in keeping with the default setup, it is recommended that you create a directory on your system with four sub-directories as follows:
|
Sub-Directory |
Description |
|
data |
This directory will contain your data files. |
|
docroot |
This is your default home directory where you will place *webster.pxp. |
|
pages |
This directory will contain your HTML pages. |
|
prog |
This directory will contain your Webster+ application programs. |
If you want to use Webster+ to access existing application programs and data, you will need to change the prefix rules according to your existing application setup. It is strongly recommended that you do not have any files/directories below the Webster+ home/starting directory as these may be subject to remote direct access.
To simplify the setup of Webster+, an install program, "*webster/install", is provided to guide you through your setup. After you have entered the necessary details, the install program will create a basic Webster+ install directory, along with the files you need to configure/run EZWeb or Apache.
Before running the install program, you will need to know the following:
|
1. |
The directory in which you want to create the Webster+ setup (docroot will be created as a sub-directory of this directory). |
|
2. |
Which Web server you will be using (Apache or EZWeb). |
|
3. |
Which Port number you want to use (HTTP Port 80, HTTPS Port 443, or other). |
|
4. |
If using an SSL/TLS secure connection and EZWeb, you will need the pathname to your PEM file. |
This utility will set up the directory, and if using Apache, it will create the configuration files required. If using EZWeb, on Windows, it will create a desktop short cut to launch EZWeb. On UNIX\Linux, it will create a script file, which can be used to start EZWeb.
Once you have the information needed for your setup (see Server Install Utility), you can run the install program by using one of the following methods:
|
Location |
Method |
|
From the PxPlus IDE Main Launcher |
Expand the Web Deployment category and select Install Webster+. |
|
From the PxPlus Command window |
Enter: run "*webster/install" |
Installing from the IDE Main Launcher
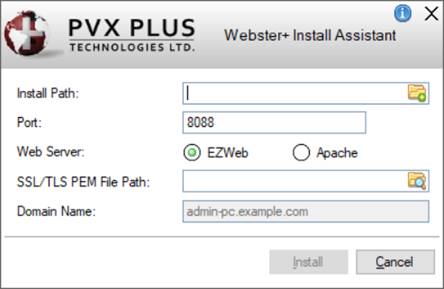
The Webster+ Install Assistant is used to enter the details for your desired Webster+ setup.
(The Webster+ Install Assistant was added in PxPlus 2023.)
This window consists of the following:
|
Install Path |
Enter the pathname of a new or existing directory in which you want to run your Webster+ website or use the Directory Browse button. If an existing directory is specified but it is not empty, a message will display. | ||||||||||
|
Port |
Enter the Port number to use. If the Port is currently in use, a message will display. | ||||||||||
|
Web Server |
Select which Web server you want to use: EZWeb or Apache. (Default is EZWeb.) | ||||||||||
|
SSL/TLS PEM File Path |
(Available when EZWeb is selected) (Optional) If using SSL/TLS, enter the pathname to the PEM file with your site certificates or use the File Query button. | ||||||||||
|
Domain Name |
(Available when Apache is selected) Enter the domain name to use (e.g. computer.example.com). | ||||||||||
|
Install |
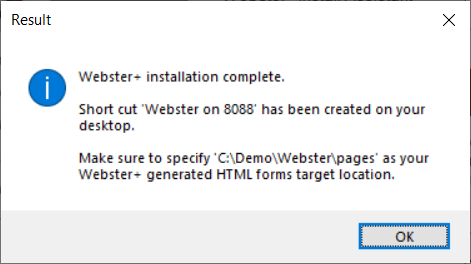
(Available when an Install Path is entered) Starts the Webster+ installation. The system creates the directory structure that you require and includes your SSL/TLS PEM file (if applicable). It copies the baseline webster.pxp program to the docroot sub-directory. When the Webster+ installation is completed, a message displays:
This message lets you know:
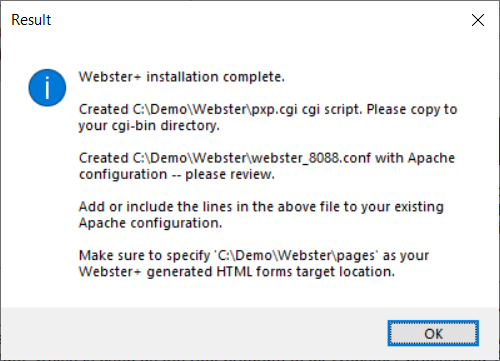
The system defines the Apache Server Name using the Domain Name. The system creates the directory structure that you require. It copies the baseline webster.pxp program to the docroot sub-directory. When the Webster+ installation is completed, a message displays: This message lets you know:
For additional information on Apache configuration, see Apache Setup. | ||||||||||
|
Cancel |
Closes the Webster+ Install Assistant without installing Webster+. |
Installing from the Command Line
The install program will ask a series of questions regarding your desired setup. Most of the questions have default answers. If you make a mistake, press the F3 key to go back one question. If you want to exit, press the F4 key.
The first question asks for the name of the target directory in which you want to run your Webster+ website. This directory will contain the docroot sub-directory in which your site will run. If the directory already exists, you will be asked to confirm that the directory name is correct.
The system then asks for the Port number to use for Webster+. If the Port is currently in use, you will be asked to confirm that the Port number is correct. For standard HTTP sites, this would normally be Port 80.
You then need to select which Web server you want to use, EZWeb or Apache.
EZWeb Setup
If you selected EZWeb, the system will now create the directory structure you require and allow you to define your SSL/TLS certificate file.
To specify your Webster+ generated HTML forms target location, select the Define Webster+ Pages Directory option on the Webster+ menu in NOMADS Library Object Selection.
If you selected Apache, the system will need to know your site domain name so that the Apache Server Name can be defined.
To specify your Webster+ generated HTML forms target location, select the Define Webster+ Pages Directory option on the Webster+ menu in NOMADS Library Object Selection.
Due to the potential differences between different versions of Apache, be sure to review the output file before copying to your Apache server. In particular, the webster_xxxx.conf file has two different options depending on the version of Apache you are running:
Extract from webster_xxxx.conf File:
|
|
<Directory "C:/somedir/webster"> |
If using Apache 2.2 or earlier, insert a # in front of the "Require all granted" lines and remove the # from the "Order allow,deny" and "Allow from all" lines.
To start EZWeb, you can either run the icon or select the Launch Webster+ Using EZWeb task from the Web Deployment category on the PxPlus IDE Main Launcher.
If you start EZWeb by running the icon, you have to connect via a browser. This would be, for your local machine, browsing to the URL http://127.0.0.1:pppp/ where pppp is the Port number. By default, EZWeb and the Apache configuration are set to run webster.pxp; thus, the URL is in effect http://127.0.0.1:pppp/webster.pxp.
If you select the Launch Webster+ Using EZWeb task on the PxPlus IDE Main Launcher, the Launch EZWeb Server window will open. Enter the Port number where Webster+ is installed. This number is reflected immediately on the Launch Webster+ on port button. Select the Save button to save this Port number as the default for the current project. To launch Webster+ on the Port specified, select the Launch Webster+ on port button. A message notifies you that EZWeb has started, and following that, a browser window will launch.
By default, the system will display the Webster+ default page *default (file *webster/default.html). However, you can include various parameters in the URL to control which page or program to run, along with the values to pass into the process. These parameters can be placed following a question mark (?) after the URL and will consist of a series of variable=value pairs with each pair separated by an ampersand (&) as per standard HTML URL formatting, as in the following example:
Example:
http://127.0.0.1/webster.pxp?pg$=clientmnt&client$=12456
This example will display the page clientmnt, having passed it the value of 123456 in the variable client$.
Webster+ itself recognizes and processes a few specific variables that can be included in the URL:
|
Variable |
Description |
|
pg$ |
Name of the page to display. |
|
tx$ |
Name of the program to run. Optionally, this can be suffixed by the event to pass to the program with a colon as in prog01:newRecord, which would run program prog01, passing it the _event$ of "newRecord". |
|
_prog$ |
Name of the program to run. |
|
_event$ |
Event to pass the program identified by the _prog$ (or tx$) value mentioned above. Optionally, the _event$ value can include (and will override) the name of the program, the actual event, and the page to display by separating these values with an at sign (@), as in the following example: Example: _event$=prog01@newRecord@product This example will load _prog$ with "prog01", _event$ with "newRecord" and set pg$ to "product". |
|
_link |
If set to non-zero (i.e. _link=1) and using a file maintenance generated page, this will cause the page to act as if the user called up a record. Generally used for drill down/query operations when the record key values are included in the URL. |
If a page is specified with no program, the page's HTML file will be passed to the Webster+ binding logic and the result displayed.
To install and run Webster+ using an IIS server, you must define both the Webster+ and its document root, along with a CGI handler for the .pxp suffix. This can be done by running the IIS Manager.
Define the Site
The first step is to run the IIS Manager, select your machine from the Connections plane on the left side, and then expand to Sites. Then, select Add Website from the Actions plane on the right side.
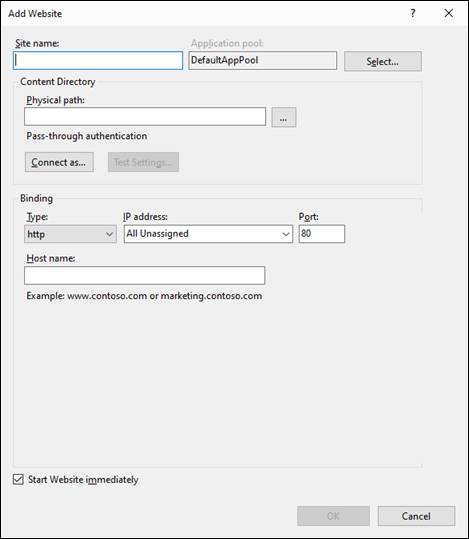
The Add Website window is displayed:
In this window, use these steps to guide you:
|
1. |
Enter a Site name to identify the site and then provide the Physical path to the docroot directory. |
|
2. |
Select the Type of binding (http or https) and enter the Port number. |
|
3. |
Enter the Web Host name, which is the domain name that the user will use to access your site. |
|
4. |
You will likely also need to set the Connect as to define the user name and security settings you want to use when running your Webster+ application. |
|
5. |
Click the OK button to have the site created. It will start immediately unless you uncheck the Start Website immediately check box near the bottom of the page. |
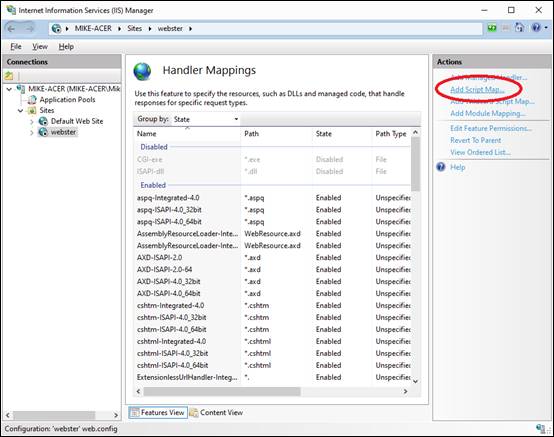
Define the CGI Handler
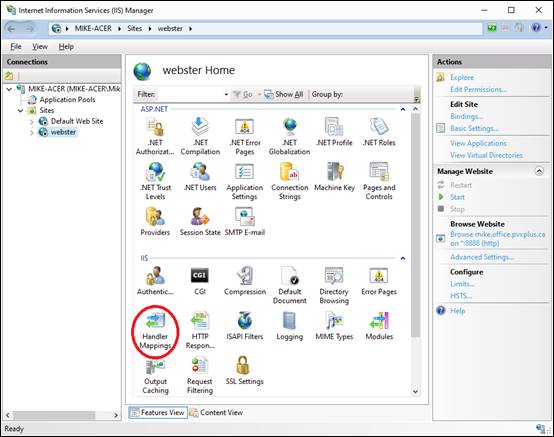
You also need to define the CGI handler for your site. Select the site you just added from the Connections plane on the left side:
This should display the various options and configuration settings for your site. Under the IIS section, you should see Handler Mappings. Double click on this to display the current mappings that are applied by default:
On the Actions plane on the right side, select Add Script Map. The Add Script Map window is displayed:
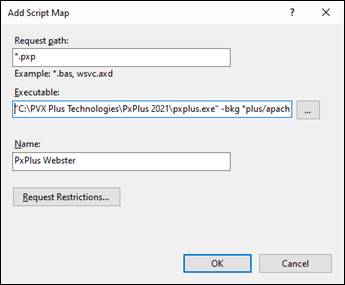
In this window, use these steps to guide you:
|
1. |
You need to specify the Request path of *.pxp, the Executable command to launch PxPlus, and a Name for the handler. |
|
2. |
The Executable command line will need to be something like the following (you will need to adjust it based on the location of your PxPlus installation): "C:\PVX Plus Technologies\PxPlus 2021\pxplus.exe" -bkg *plus/apache/pxp_cgi -arg debug |
|
3. |
Click the OK button to create this CGI handler for your website. |
|
4. |
Once the site has been defined, you should be able to start the site and connect. |
(Support for IIS Setup for Webster+ was added in PxPlus 2022.)
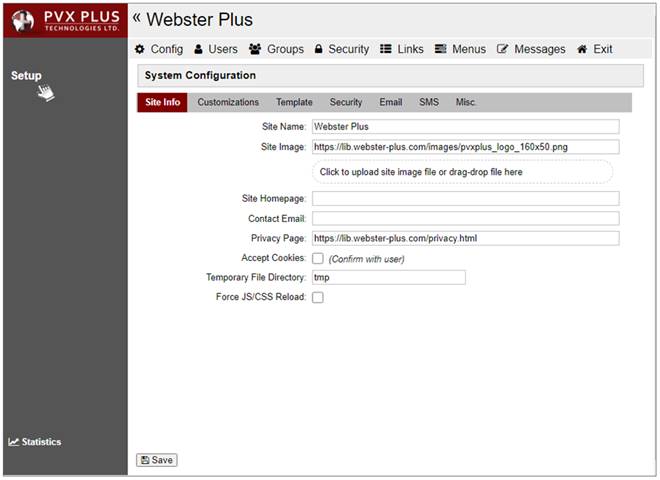
Webster+ will provide a default landing page (*webster/pages/default.html) as shown below:
This default page can be changed by providing a "_default.html" page in your application (generally in pages/_default.html if using the typical directory layout).
Clicking the Setup option shown on the left side will bring up the System Configuration page:
By using the toolbar across the top of the screen, you can select the various Webster+ configuration utilities:
|
Menu Selection |
Description |
|
This utility allows you to configure the site information (i.e. name, etc.), colors, custom CSS, and security settings. In addition, you can configure the Email server and SMS server that the site will use. | |
|
This utility allows you to add, edit and delete users on the system. | |
|
This utility allows you to define the various security groups on the system and the hierarchy of those groups. | |
|
This utility allows you to control which page, program or report that specific groups of users can run. | |
|
This utility allows you to define the links that will appear on the left sidebar when using the default template. | |
|
This utility can be used to edit/define menus for use throughout the system. | |
|
This utility allows you to create and maintain message libraries to be used within Webster+. |