Library Object Selection 

Menu Options


Several methods are available for accessing Library Object Selection functionality: selecting drop-down menu bar options, clicking on associated buttons or tool bar options (see Button Options), or right clicking on a selected object in the Object list.

Note:
For all View displays (Button View, Toolbar View or Menubar View), right clicking in the Objects list displays a popup menu with the following selections: Open, Copy, Delete, Test NOMADS Panel, Preview HTML Page, Customize Panel, Add to Project and Refresh. Some of these are also available as Button Options.

The Preview HTML Page option is available only when right clicking on a file maintenance panel object (object Type "Dh") where an HTML page was generated. To preview an HTML page, a valid Webster Preview URL is required. If the URL has not been defined, a message will display.

(The Refresh option was added in PxPlus 2019.)
(The Preview HTML Page option was added in PxPlus 2021.)
(The Open option on the right click menu was added in PxPlus 2021 Update 1.)

The options and utilities below are listed in the order that they appear on the menu bar in Library Object Selection: Objects, Options, Library, Utilities, Views, Projects, Designer, iNomads, Webster+, Details and Quit.

Objects

Lists options for creating or editing various object definitions. For information on these object definitions, see Creating Library Objects.

Panel Object

Provides the GUI layout for the control objects required to interact with your application.

Query Object

Consists of a panel that displays records from a data file and returns a value associated with a record selected by the user (default is the value in the first column).

File Maint

Launches the File Maintenance Generator after the name of a new panel has been entered.

(The File Maintenance Generator was added in PxPlus 2019.)

Popup Menu Object

Menu objects that appear when the user right clicks while hovering the mouse pointer over a selected control or panel area. They appear much like the drop-down menus on a menu bar except that they can be placed anywhere on the panel and are invisible until they are invoked.


Options

Lists options for editing, copying, deleting, testing and printing.

Edit

Launches the creation/maintenance tool specific to the currently highlighted object name (has the same effect as double-clicking the item).

Copy

(Available on the right click popup menu - see Note above)

Launches the Copy Screen Objects utility.

Delete

(Available on the right click popup menu - see Note above)

Removes the selected object(s). Prior to deleting, a message will display.

Note:
The Delete key can also be used to remove one or more selected objects.

(Support for the Delete key was added in PxPlus 2019.)

Test

(Available on the right click popup menu - see Note above)

Runs the selected panel object in test mode within NOMADS. Use the Esc or the F4 key to exit test mode. See Edit Mode vs. Test Mode.

Print

Launches the Print Panels dialogue to print a report of a library or selected panels within a library.

Refresh

(Available on the right click popup menu - see Note above)

Refreshes the list of Library objects.

(The Refresh option was added in PxPlus 2019.)


Library

Lists options to set library defaults and assign groups.

Library Defaults

Launches Library Defaults.

Assign Groups

Launches Group Assignment.


Utilities

Lists options for various library utilities.

Compare

Launches the Library Compare utility.

Search/Replace

Launches the Search/Replace utility.

Merge

Launches the Merge Panels utility.

Export

Launches the Export Library Objects to Text File utility.

Import

Launches the Import Library Objects from Text File utility.

AutoChart File Maintenance

Launches the AutoChart Definition File Maintenance utility.

Chart Image Scheduler

Launches the Chart Image Generation Schedule Maintenance utility.

Create/Remove Customizer Library

Creates (or removes) the Customizer Definition file for the current library.

(The Create/Remove Customizer Library option was added in PxPlus 2017.)

Customize Panel

(Available on the right click popup menu - see Note above)

Launches the Customizer General Maintenance utility.

Library Bulk Edit

Launches the Library Bulk Edit and Search utility.

Query Bulk Edit

Launches the Query Bulk Edit utility.

Query Profile Maintenance

Launches the Query Profile Information Maintenance utility.

Calendar

Launches the Calendar Control Definition utility.

(The Calendar utility was added to the Utilities menu in PxPlus 2022.)

Themes Maintenance

Launches the Themes Maintenance utility.

(Themes Maintenance was added to the Utilities menu in PxPlus 2019.)

Visual Class Maintenance

Launches the Visual Classes Maintenance utility.

(Visual Class Maintenance was added to the Utilities menu in PxPlus 2019.)

Visual Class Assignment

Launches the Visual Class Assignment utility.


Views

Lists options for the display style to use for accessing common functions in the Library Object Selection window.

Button View

Presents a series of buttons at the bottom of the window.

Toolbar View

Presents a series of tool bar options at the top of the window.

Menubar View

Presents a menu bar.


Projects

Lists options for projects. For information on adding tasks to projects, see Adding Tasks to Projects from Other Locations.

Create New Project

Launches the Create Project dialogue for entering a new project for the current working directory. Click the Query button to select a different working directory.

Add All Objects to Project

Launches the Add to Project dialogue for selecting the existing project to which all objects in the current screen library will be added.

Add Selection(s) to Project

Launches the Add to Project dialogue for specifying the existing project to which only the highlighted object(s) selected from the list will be added.

Note:
You can also select Add to Project from the popup menu that is invoked by right clicking on a selected object.


Designer

Lists options for Panel Designer styles.

(The Designer menu was added in PxPlus 2016.)

Nomads+

Select this option to use the NOMADS+ Toolbar panel designer style.

Property Sheets

Select this option to use Property Sheets panel designer style.

Folder Style

Select this option to use the Folder Style panel designer style.


iNomads

Important Note:
iNomads is not available with a base PxPlus activation. Contact your PxPlus reseller or visit the PxPlus website www.pvxplus.com for product information and licensing.

Lists options for creating and running the selected object in iNomads. The selected object must be a Dialogue or Window.

An object must be selected first in the Object List prior to selecting the iNomads menu; otherwise, a message displays as a reminder. If multiple objects are selected, the object listed first in the range of highlighted selections is used to determine whether the iNomads menu can be enabled.

(The iNomads menu was added in PxPlus 2017.)

Create/Edit Transaction

Launches iNomads Transaction Maintenance for the selected object, using this object's details to populate certain fields.

Run Transaction

Displays the selected object in iNomads in "test" mode on a new Web browser page using the admin template. This allows you to preview the object so you can determine if further adjustments are needed in the NOMADS Panel Designer. If the selected object already exists in iNomads Transaction Maintenance, that transaction will be run.

Note:
This "test" functionality is not available when running WindX.


Webster+

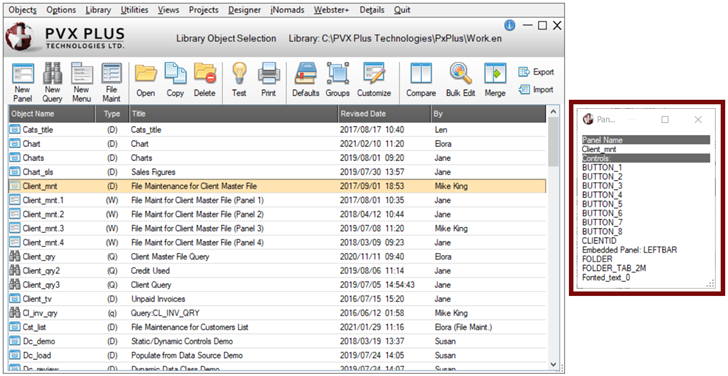
PxPlus HTML generation and processing application used to create HTML pages.

(The Webster+ menu was added in PxPlus 2021.)

Define Webster+ Pages Directory

Launches a separate window for entering the directory in which the generated File Maintenance HTML pages will be created.


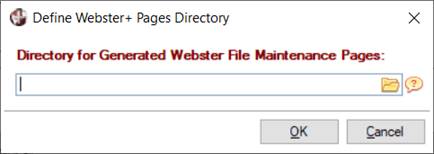
The recommended directory is the \pages directory under the location in which Webster+ was installed; however, any directory location can be used.

Example:

C:\web\pages (assumes that Webster+ was installed in C:\web)

Webster Preview URL

Launches a separate window for entering a valid URL, which is required to preview an HTML page created by the File Maintenance Generator.


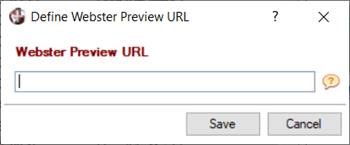
A Web server must be running and pointing to an installation of Webster+. The URL should specify the server and the port number, separated by a : (colon).

Example:

localhost:8088/ (indicates that the Web server is running on your local machine on port 8088)


Details

Displays a concurrent window with information about the currently selected object.

(The Details menu was added in PxPlus 2017 Update 0002.)


The information displayed varies depending on the type of object selected:


Panels (Dialogues and Windows)

Displays control names, alternate and substitute panels, and customization.


Queries (Queries and Query Lists)

Displays the main file, file links and columns (fields and formulas).


Popup Menus

Displays the top-level menu items.

Once invoked, this information window continues to display for the session until it is closed.

Example:

Below is an example of the information window displayed for a selected panel:


Quit


Closes the Library Object Selection window.